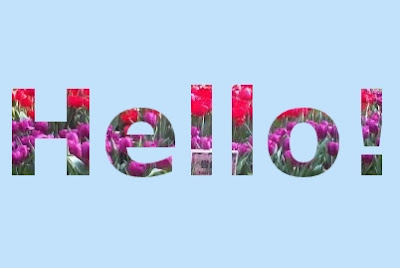
- 承接前節的範例,繼續美化文字的工作。
- 除了可利用程式內建的圖樣,來為文字填上不同的紋路,任何圖案與影像若是合適,也可以作為文字的底色與紋路。
- 鬱金香的紫色與紅色還蠻醒目的,下面利用花朵的外形與色澤來寫字。
- 以GIMP開啟 tulip.jpg 鬱金香。
- 將圖片另外儲存為 tulip_text.xcf, XCF 格式較適於儲存過程中的半成品。
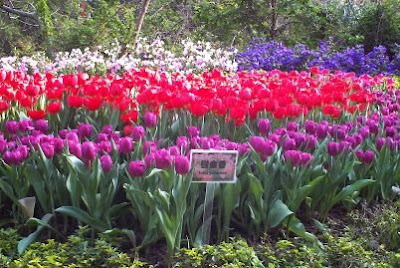
- 在工具箱中,按下文字按鈕,點一下tulip_text.xcf圖片顯示視窗。
- 在GIMP文字編輯器的輸入框,鍵入 Hello! 。
- 在文字工具的選項面版內,將字型樣式設為Sans Bold,大小設為 120。
- 點選tulip_text.xcf圖片顯示視窗,將 Hello! 字樣放在適當的地方。把小寫的 l 放在鬱金香牌子的上方。
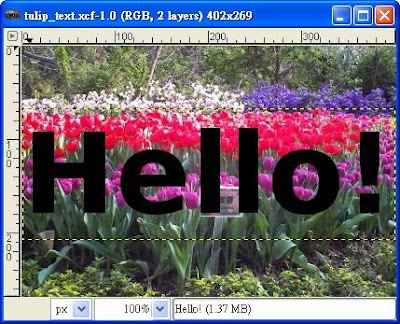
- 要選著黑色的 Hello! 字樣,有很多方法。
- 因為有透明的背景,因此可在文字圖層上,執行[影像] / 圖層 / 透明度 / 透明區域轉為選擇區域 【註1】 。
注意!
「透明區域轉為選擇區域」的原文為Alpha to Selection,實際上,執行後,是「不透明」的區域被選著。 |
- 現在,圖層面版內,文字圖層的眼睛圖示按掉,使文字圖層的效果不顯示出來。

- 在tulip_text.xcf視窗,會看到的情形,如下圖所示,在鬱金香上,產生一個 Hello! 字樣的選取區域。
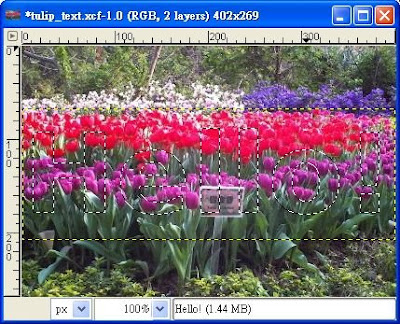
- 在圖層面版內,點選「背景」圖層,也就是鬱金香的圖。
- 點選tulip_text.xcf視窗,執行[影像] / 選擇 / 相反 【註2】 。
- 將前景色設為淺藍,執行[影像] / 編輯 / 填上前景顏色 【註3】 。
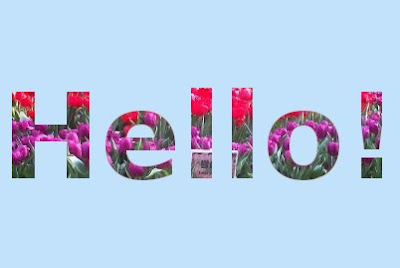
- 結果圖為淺藍的底色,身穿花花衣的 Hello! 字樣,如下圖所示,還看得出它是鬱金香嗎?
選單及項目名稱的英文:
【註1】 [Image] / Layer / Transparancy / Alpha to Selection
【註2】 [Image] / Select / Invert
【註3】 [Image] / Edit / Fill with FG Color
- 接續前面的練習操作,改用 Python-Fu 自動化字體的生成流程。
- 下面的程式碼,分成三大部份:
- 首先,要載入影像 tulip.jpg ,取得 tulip.jpg的圖層物件。
- pdb.gimp_text_fontname(...) 寫上粗體字的 Hello!
- pdb.gimp_edit_fill(...) 填上藍色,凸顯出身穿花花衣的 Hello!
# Part 1.
# 下載 tulip.jpg 鬱金香圖案
# 將 tulip.jpg 放在你找得到的位置,例如,tmp 目錄
#filename = os.getcwd()+"/"+"tulip.jpg"
filename = "/tmp/tulip.jpg"
tulip_img = pdb.file_jpeg_load(filename, filename)
tulip_layer = pdb.gimp_image_get_active_layer(tulip_img)
# 圖片的尺寸
width = pdb.gimp_image_width(tulip_img)
height = pdb.gimp_image_height(tulip_img)

pdb.gimp_display_new(tulip_img)
# Part 2.
string = "Hello!"
font_size = 120
#font = "Sans Bold" # 竟然沒有粗體字的效果
font = "DejaVu Sans Bold"
# 測試環境為 Ubuntu 11.10
# 需注意你所使用的作業系統有無 "DejaVu Sans Bold" 字型

text_ext = pdb.gimp_text_get_extents_fontname(string, font_size, PIXELS, font)
text_width = text_ext[0]
text_height= text_ext[1]
# 將 Hello! 字樣放在適當的地方
text_offx = width/2 - text_width/2
text_offy = height/2 - text_height/2

text_layer = pdb.gimp_layer_new(tulip_img, width, height, RGBA_IMAGE, "Hello!", 100, NORMAL_MODE)
pdb.gimp_image_add_layer(tulip_img, text_layer, 0)

pdb.gimp_context_set_foreground(black)
tmp_layer = pdb.gimp_text_fontname(tulip_img, text_layer, text_width, text_height ,string, 0, TRUE, font_size, PIXELS, font)
pdb.gimp_layer_set_offsets(tmp_layer, text_offx, text_offy)
pdb.gimp_floating_sel_anchor(tmp_layer)
# Part 3.
# 利用 Hello! 字體產生選取區域
# 這一行是重要的關鍵
pdb.gimp_selection_layer_alpha(text_layer)

pdb.gimp_selection_invert(tulip_img)

# 前景色設為天空藍
sky_blue = (194, 226, 251)
pdb.gimp_context_set_foreground(sky_blue)
pdb.gimp_edit_fill(tulip_layer, FOREGROUND_FILL)

pdb.gimp_layer_set_visible(text_layer, FALSE)
pdb.gimp_selection_none(tulip_img)
- 啟動 GIMP Python Console
- 將前面的程式碼,依次序,全部選取、複製、再貼到 Python Console 提示符號 >>> 之後,按下 Enter 。
- 過一會,就會看到身穿花花衣的 Hello! 字體,如下圖所示。
