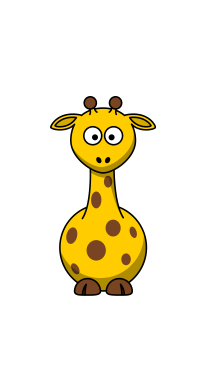
- 只要能替物體去除背景,就能得到物體輪廓的剪影。
- 物體輪廓的剪影,妙用無窮,最主要,還是用來凸顯主體本身。
- 接續前一節,以下示範藍光結冰效果,原理是利用長頸鹿的剪影,製作出灰階的閃光。

- 載入的圖片,之後,是要透過 Python Code 來潤飾影像。
- a. 可以手動下載本網頁上的「長頸鹿」圖片,而後,透過 GIMP 圖形介面,載入「長頸鹿」的圖片。
- b. 也可,完全用 Python Code 下載並載入 lemmling_Cartoon_giraffe.png
- 方法 a. 使用 GIMP 圖形介面,找到圖檔 lemmling_Cartoon_giraffe.png,而後,載入到影像視窗內。接著,透過 Python Code 設定影像物件的變數。
img_array = gimp.image_list()
img = img_array[0] # 必須確定此為「最新載入的影像」
drw_backup = pdb.gimp_image_get_active_layer(img)
- 方法 b. 直接透過 file_uri_load ,載入網路上的圖檔到影像視窗內。
file_uri = "https://blogger.googleusercontent.com/img/b/R29vZ2xl/AVvXsEiXwQezpqd34glH5AbM9lK_yJfbXM8nayxc7RHoCuOnDVjWZh2q_Q8ORk5ABMg_EZuUNvcs_6qcB6b8E9omng-DSMLnVva2ewVEwnI16rJx23iVwPOcnD01FsI7yRGXuv1zMWctzraVeoFn/s512/lemmling_Cartoon_giraffe.png"
img = pdb.file_uri_load(file_uri, file_uri)
drw_backup = pdb.gimp_image_get_active_layer(img)
pdb.gimp_drawable_set_name(drw_backup, "Giraffe Original")
pdb.gimp_display_new(img)
- 啟動 GIMP Python Console
- 前面兩種方式都可載入「長頸鹿」圖片。
- 將前面的程式碼,選取、複製、再貼到 Python Console 提示符號 >>> 之後,按下 Enter 。
- 過一會,就會看到新的影像視窗,內有「長頸鹿」圖片。
- 下圖只呈現「長頸鹿」圖片。

長頸鹿,圖片來源OpenClipArt
- 下面的程式碼,可將藍光結冰的視效,添加在字體的外圍,也可以添加在圖案的外圍
- ALPHA_TO_LOGO = True ,表示對長頸鹿的圖案,施加藍光結冰效果
- 下面的程式碼,分成六大部份:
- 首先,準備好新的影像、新的圖層。
- 產生純色的長頸鹿的剪影
- 白色雜點 Noisify + 閃光 Sparkle
- 弄糊灰階的閃光,調色,產生藍光結冰的感覺
- 漸層效果 + 立體效果(此部份用於藍光結冰的字體,省略不做)
- 調整圖層的結構,與顯示的順序
# Part 1.
# 決定 True or FALSE
# 決定是 ALPHA_TO_LOGO 或是 TEXT_EFFECT
ALPHA_TO_LOGO = True
#ALPHA_TO_LOGO = FALSE
TEXT_EFFECT = not ALPHA_TO_LOGO

black = (0, 0, 0)
white = (255, 255, 255)
red = (255, 0, 0)
yellow =  (255, 255, 0)
ice_blue = (53, 216, 244)

if ALPHA_TO_LOGO:
  # 長頸鹿
  file_uri = "https://blogger.googleusercontent.com/img/b/R29vZ2xl/AVvXsEiXwQezpqd34glH5AbM9lK_yJfbXM8nayxc7RHoCuOnDVjWZh2q_Q8ORk5ABMg_EZuUNvcs_6qcB6b8E9omng-DSMLnVva2ewVEwnI16rJx23iVwPOcnD01FsI7yRGXuv1zMWctzraVeoFn/s512/lemmling_Cartoon_giraffe.png"
  # GIMP 吉祥物 Wilber
  #file_uri = "https://blogger.googleusercontent.com/img/b/R29vZ2xl/AVvXsEhMKRcvr2wtbpxu-GCWvlY5GNRvBtPXUeY5JJgdZj-munau_YCSReuiBDAPMccuETSJSl7eyFNkHprg65prGTyREituCJ4F56n304aDdIbwq9fqsEFavmd7GLSHs4q5Fg3Z_WywRpX5S2zt/s512/wilber_work.png"
  img = pdb.file_uri_load(file_uri, file_uri)
  drw_backup = pdb.gimp_image_get_active_layer(img)
  pdb.gimp_drawable_set_name(drw_backup, "Giraffe Original")
  # 長頸鹿的圖案決定了圖片的尺寸
  width = pdb.gimp_image_width(img)
  height = pdb.gimp_image_height(img)

if TEXT_EFFECT:
  # 直接決定圖片的尺寸
  width = 256
  height = 160
  string = "ICE"
  font_size = 72
  #font = "Arial"
  #font = "Sans"
  font = "DejaVu Sans Bold"
  text_ext = pdb.gimp_text_get_extents_fontname(string, font_size, PIXELS, font)
  text_width = text_ext[0]
  text_height= text_ext[1]
  # 決定 ICE 字樣要放置的位置
  text_offx = width/2 - text_width/2
  text_offy = height/2 - text_height/2
  img = pdb.gimp_image_new(width, height, RGB)

# ALPHA_TO_LOGO 與 TEXT_EFFECT 這一部份的程式碼相同
# 生成黑色的背景圖層
bg_layer = pdb.gimp_layer_new(img, width, height, RGB_IMAGE, "Background", 100, NORMAL_MODE)
pdb.gimp_image_add_layer(img, bg_layer, 0)
pdb.gimp_context_set_foreground(black)
pdb.gimp_edit_fill(bg_layer, FOREGROUND_FILL)
pdb.gimp_display_new(img)
# Part 2.
if ALPHA_TO_LOGO:
  # 純色的長頸鹿的剪影
  logo_backup = pdb.gimp_layer_copy(drw_backup, TRUE)
  pdb.gimp_image_add_layer(img, logo_backup, -1)
  pdb.gimp_drawable_set_name(logo_backup, "Logo Backup")
  pdb.gimp_selection_layer_alpha(logo_backup)
  pdb.gimp_context_set_foreground(black) # 填入黑色
  pdb.gimp_edit_fill(logo_backup, FOREGROUND_FILL)
  pdb.gimp_selection_none(img)

if TEXT_EFFECT:
  # 對文字效果而言,純色的字體,其意義,等同於長頸鹿的剪影
  # 因此,字體 就是 logo
  logo_backup = pdb.gimp_layer_new(img, width, height, RGBA_IMAGE, "Text (Logo Backup)", 100, NORMAL_MODE)
  pdb.gimp_image_add_layer(img, logo_backup, 0)
  pdb.gimp_context_set_foreground(black)
  tmp_layer = pdb.gimp_text_fontname(img, logo_backup, text_width, text_height ,string, 0, TRUE, font_size, PIXELS, font)
  pdb.gimp_layer_set_offsets(tmp_layer, text_offx, text_offy)
  pdb.gimp_floating_sel_anchor(tmp_layer)
# Part 3. 閃光 Sparkle
pdb.gimp_selection_layer_alpha(logo_backup)
pdb.plug_in_noisify(img, bg_layer, FALSE, 0.8, 0.8, 0.8, 0.8)
pdb.plug_in_noisify(img, bg_layer, FALSE, 0.8, 0.8, 0.8, 0.8)
pdb.gimp_selection_none(img)

lum_threshold = 0.019 #
flare_inten = 0.5
spike_len = 60 #
spike_pts = 4
spike_angle = 15
density = 1
transparency = 0
random_hue = 0
random_saturation = 0
preserve_luminosity = FALSE
inverse = FALSE
border = FALSE
color_type = 2 # BACKGROUND
pdb.gimp_context_set_background(white)
pdb.plug_in_sparkle(img, bg_layer, lum_threshold, flare_inten, spike_len, spike_pts, spike_angle, density, transparency, random_hue, random_saturation, preserve_luminosity, inverse, border, color_type)
# Part 4.
# 弄糊灰階的閃光

fuzzy_layer = pdb.gimp_layer_copy(logo_backup, TRUE)
pdb.gimp_image_add_layer(img, fuzzy_layer, -1)
pdb.gimp_drawable_set_name(fuzzy_layer, "Fuzzy")

blur_radius = 10
pdb.plug_in_gauss_iir(img, fuzzy_layer, blur_radius, 1, 1)

pdb.gimp_image_lower_layer(img, fuzzy_layer)
bg_layer = pdb.gimp_image_merge_down(img, fuzzy_layer, EXPAND_AS_NECESSARY)
pdb.gimp_drawable_set_name(bg_layer, "Background")

blur_radius = 1
pdb.plug_in_gauss_iir(img, bg_layer, blur_radius, 1, 1)
pdb.plug_in_gauss_iir(img, bg_layer, blur_radius, 1, 1)
pdb.plug_in_gauss_iir(img, bg_layer, blur_radius, 1, 1)

# 調色產生藍光結冰的感覺
pdb.gimp_color_balance(bg_layer, 0, TRUE, 0, 0, 100)
pdb.gimp_color_balance(bg_layer, 1, TRUE, 0, 0, 100)
pdb.gimp_color_balance(bg_layer, 2, TRUE, 0, 100, 100)
# Part 5.
# 漸層效果 + 立體效果
if TEXT_EFFECT:
  pdb.gimp_layer_set_visible(logo_backup, TRUE)
  logo_layer = pdb.gimp_layer_copy(logo_backup, TRUE)
  pdb.gimp_image_add_layer(img, logo_layer, -1)
  pdb.gimp_drawable_set_name(logo_layer, "Gradient Effect Logo")
  pdb.gimp_layer_set_lock_alpha(logo_layer, TRUE)
  pdb.gimp_context_set_foreground(ice_blue )
  pdb.gimp_context_set_background(white)
  offset =0 ;repeat = REPEAT_TRIANGULAR;reverse = FALSE;
  supersample = FALSE ; max_depth = 0 ; threshold = 0;
  dither = TRUE ;
  x1 = text_offx; y1 = text_offy; x2 = text_offx + 10; y2 = text_offy +10 # 相當於由字的左上角往右下拉一小段直線
  pdb.gimp_blend(logo_layer,  FG_BG_RGB_MODE, NORMAL_MODE, GRADIENT_LINEAR, 100, offset, repeat, reverse, supersample, max_depth, threshold, dither, x1, y1, x2, y2)
  #
  pdb.plug_in_bump_map(img, logo_layer, logo_layer, 135.0, 35, 3, 0, 0, 0, 0, TRUE, FALSE, 0)
# Part 6.
# 調整圖層的結構,與顯示的順序
# 讓「藍光結冰效果 」烘托「長頸鹿」圖案
# 或烘托「漸層的 ICE」字樣
if ALPHA_TO_LOGO:
  pdb.gimp_image_raise_layer_to_top(img, drw_backup)
  pdb.gimp_layer_set_visible(logo_backup, FALSE)

if TEXT_EFFECT:
  pdb.gimp_layer_set_visible(logo_backup, FALSE)
- 啟動 GIMP Python Console
- 將前面的程式碼,依次序,全部選取、複製、再貼到 Python Console 提示符號 >>> 之後,按下 Enter 。
- 過一會,就會看到藍光結冰效果,與其圖層結構,如下圖所示。

spike_len = 30

spike_len = 60


- Wilber 是 GIMP 的吉祥物。
- 圖片來源 GIMP 官方網站 Wilber, the GIMP mascot
- 原圖是 PNG 格式,背景為透明。
- 擴張原圖外圍的透明區域,讓外圍有足夠的空間可以施加藍光結冰效果。
- 使用前面的程式碼,修改 file_uri = "......" 直接透過網路,載入圖檔到影像視窗內。
- 還要修改 spike_len
file_uri = "https://blogger.googleusercontent.com/img/b/R29vZ2xl/AVvXsEhMKRcvr2wtbpxu-GCWvlY5GNRvBtPXUeY5JJgdZj-munau_YCSReuiBDAPMccuETSJSl7eyFNkHprg65prGTyREituCJ4F56n304aDdIbwq9fqsEFavmd7GLSHs4q5Fg3Z_WywRpX5S2zt/s512/wilber_work.png"
spike_len = 30
- 藍光結冰效果如下圖所示。


