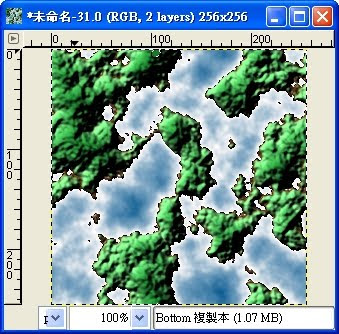
- 對 Bottom 圖層,執行[影像] / 選擇 / 依顏色【註1】,此功能其實是「依顏色選擇按鈕工具」,在工具選項面版內,界限值(Threshold)設55,將灰階為190的灰色及其附近的顏色選住。

- 對應的程式碼
54: (gimp-by-color-select layer-one '(190 190 190) 55 CHANNEL-OP-REPLACE FALSE FALSE 0 FALSE)
- 對bottom Copy圖層,執行[影像] / 濾鏡 / 映射 / 凹凸貼圖【註2】,Bump Map圖層設bottom圖層,其餘參數在對話盒中為預設值,即Map Type選線性(Linear),勾選Compensation for Darkening,Azimuth設為135,Elevation設為35,深度(Depth)設為60(對應landheight變數),其餘設為 0。

- 對應的程式碼
55: (plug-in-bump-map RUN-NONINTERACTIVE img layer-two layer-one 135.0 35 landheight 0 0 0 0 TRUE FALSE 0)
- 3. 執行[影像] / 選擇 / 相反【註3】,將選取區域反轉。
- 4. 對「Bottom複製本」,執行[影像] / 濾鏡 / 映射 / 凹凸貼圖【註4】,Bump Map圖層設為bottom圖層,其餘參數在對話盒中為預設值,即Map Type選線性(Linear),勾選Compensation for Darkening,Azimuth設為135,Elevation設為35,深度(Depth)設為4(對應seadepth變數),其餘設為0。
- 5. 執行[影像] / 選擇 / 全部不選【註5】,釋放選取區域。
- 前面三步驟,對應到的程式碼
58: (gimp-selection-invert img)
59: (plug-in-bump-map RUN-NONINTERACTIVE img layer-two layer-one 135.0 35 seadepth 0 0 0 0 TRUE FALSE 0)
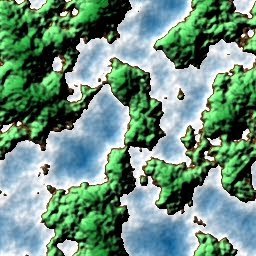
- 下圖展示了 land.scm 最終的執行結果。

- 下圖展示了最終的圖層結構。

選單及項目名稱的英文:
【註1】[Image] / Select / By Color
【註2】[Image] / Filters / Map / Bump Map
【註3】[Image] / Select / Invert
【註4】[Image] / Filters / Map / Bump Map
【註5】[Image] / Select / None


